The first step is to get the toolchain on your computer. This will heavily reference the
instructions for building FabTinyISP, linked here:
Scroll down and you'll come to the instructions for Software installation. This is assuming
you have made the board, finished soldering it, and confident that the circuit is not about
to short out one of your USB ports. There are seperate instructions depending on your OS, windows
MacOS or even Linux. This will focus on windows, which happens to be the least straightforward.
Programming your Programmer, requires a working programmer. Plug in the working programmer, and
open up your device manager, somewhere you should be able to see working programmer listed as USBtinySPI.
After that you can start downloading the toolchain from that link above.
I recommend not deviating from those instructions in any way, even where to Extract the files to.
One thing to note, there is a step that involves a program called Zadig, Disconnect all
other USB devices, and be very sure which device you are targetting. And if you are worried you might
mess it up, try this process on a laptop first, and not your expensive PC.
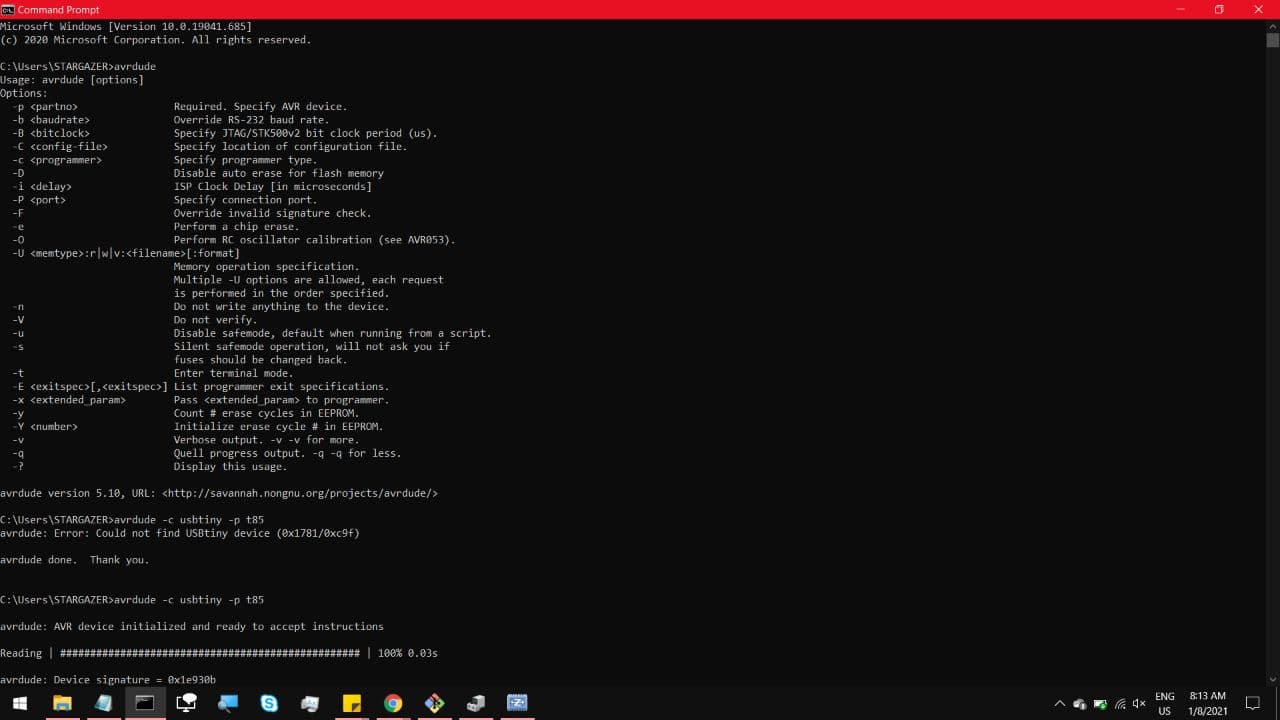
I had no photos of this process, as I had been trying and failing over the course of the past 2 months,
and only recently managed to get it working. The most I have from it is the sanity check right at the end,
which is used to tell if all the programs in the toolchain are running right. That should run fine, if it
does show some errors like "command not found", best strategy is to read the documentation, and ask for help.
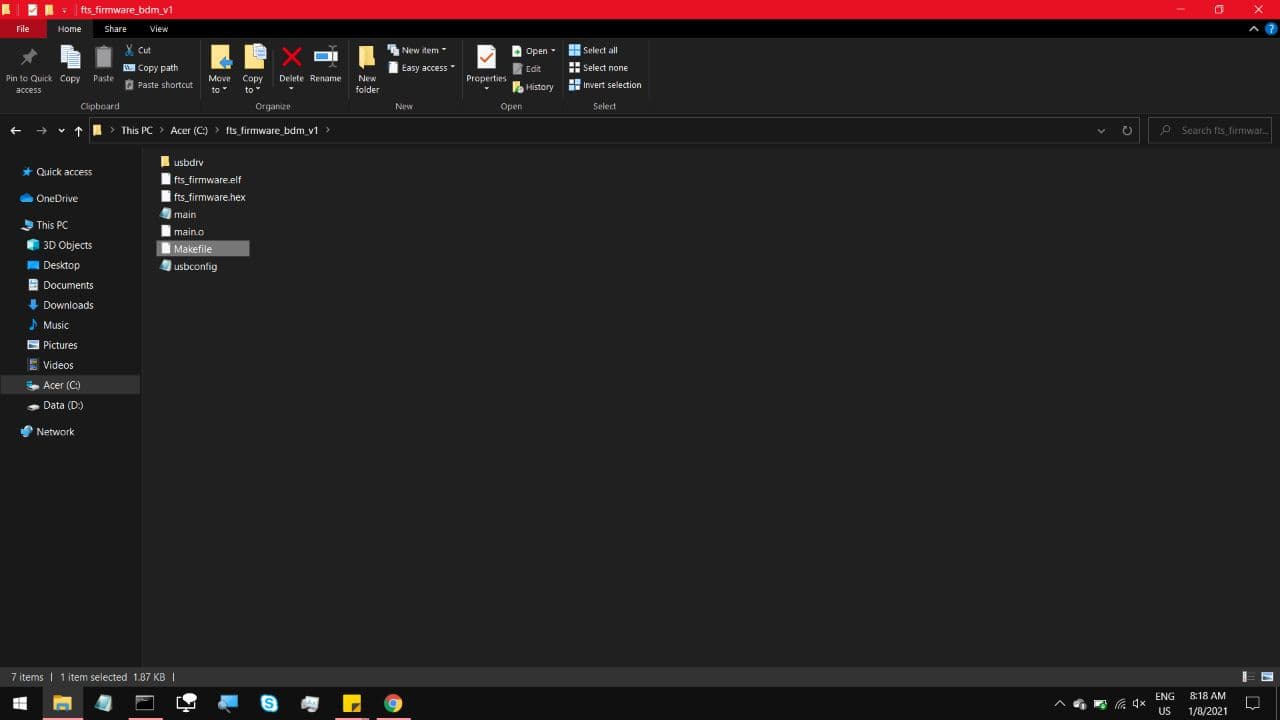
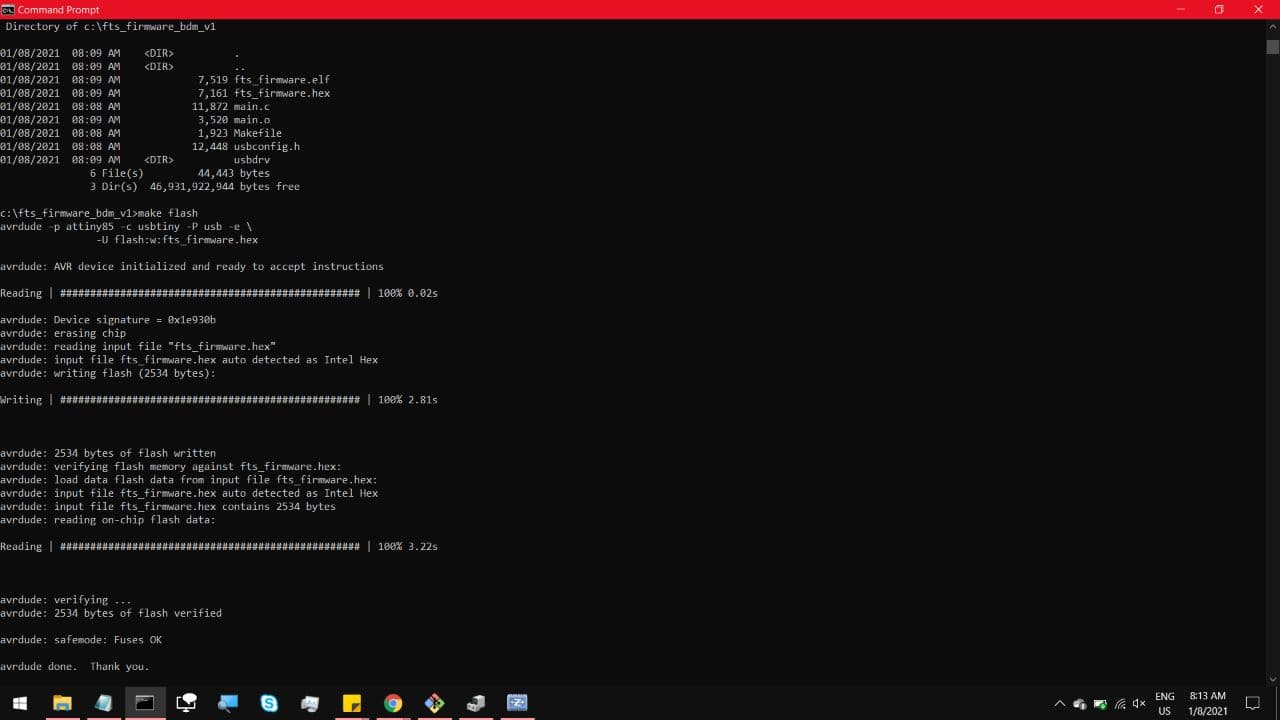
Now go back to the main page, and download a file called fts_firmware_bdm_v1, and extract it to somewhere easy
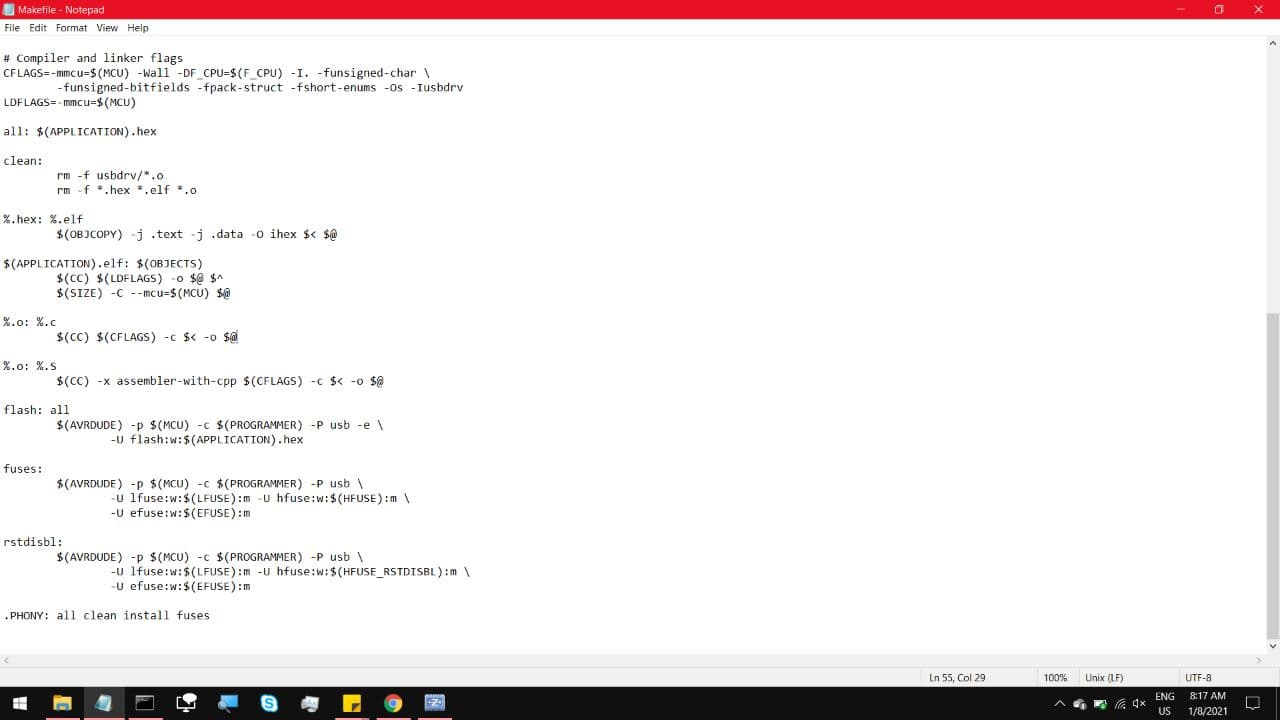
to get to like the C drive main directory. Go in and open the file named Makefile
open it in something like Brackets or notepad, and change this highlighted line
MCU = attiny45. Our board uses an attiny85 chip, so that line has to change
to MCU = attiny85. Hit save, and keep that file open for reference.
Now open up your command prompt, and follow these commands, in this order.
avrdude -c usbtiny -p t85
you can go in and see what this does if you enter just avrdude
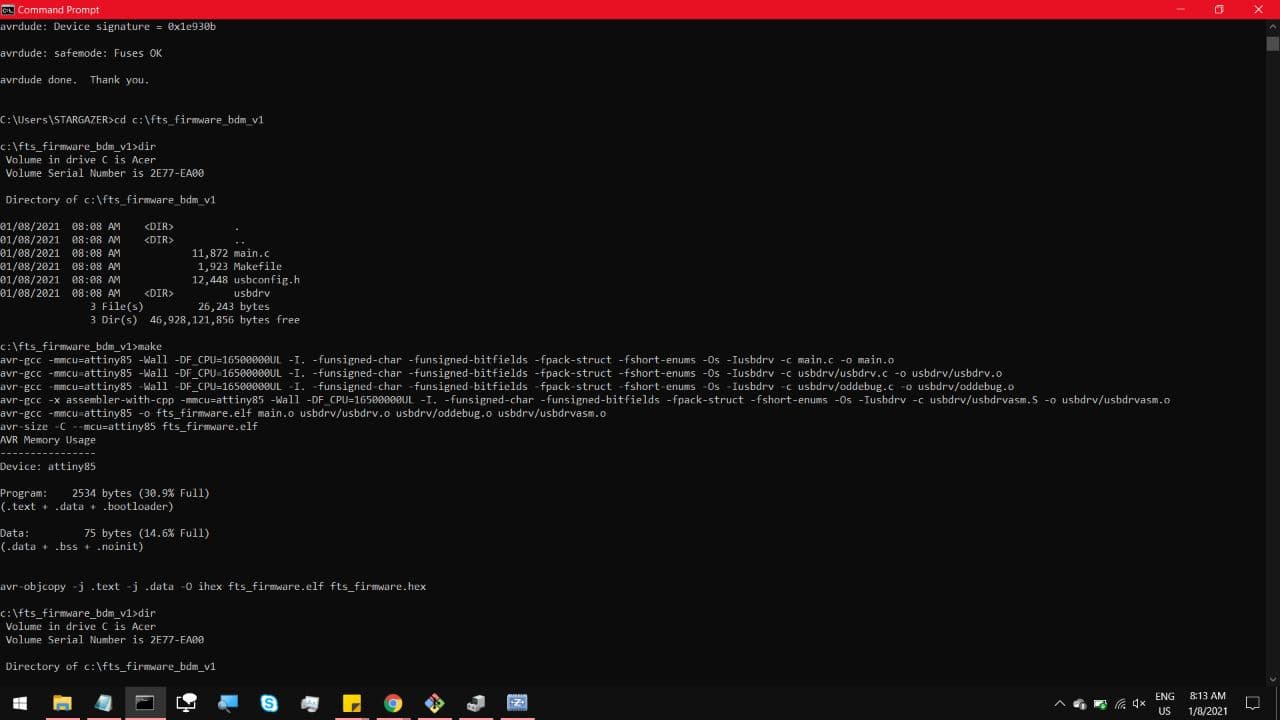
cd c:\fts_firmware_bdm_v1
this step is just to enter the directory of where your fts_firmware_bdm_v1 file is,
in my case its in that directory, so change it to yours if its not the same.
dir
make
this will build a .hex file
dir
make flash
this will use the working programmer, and load this onto the target programmer
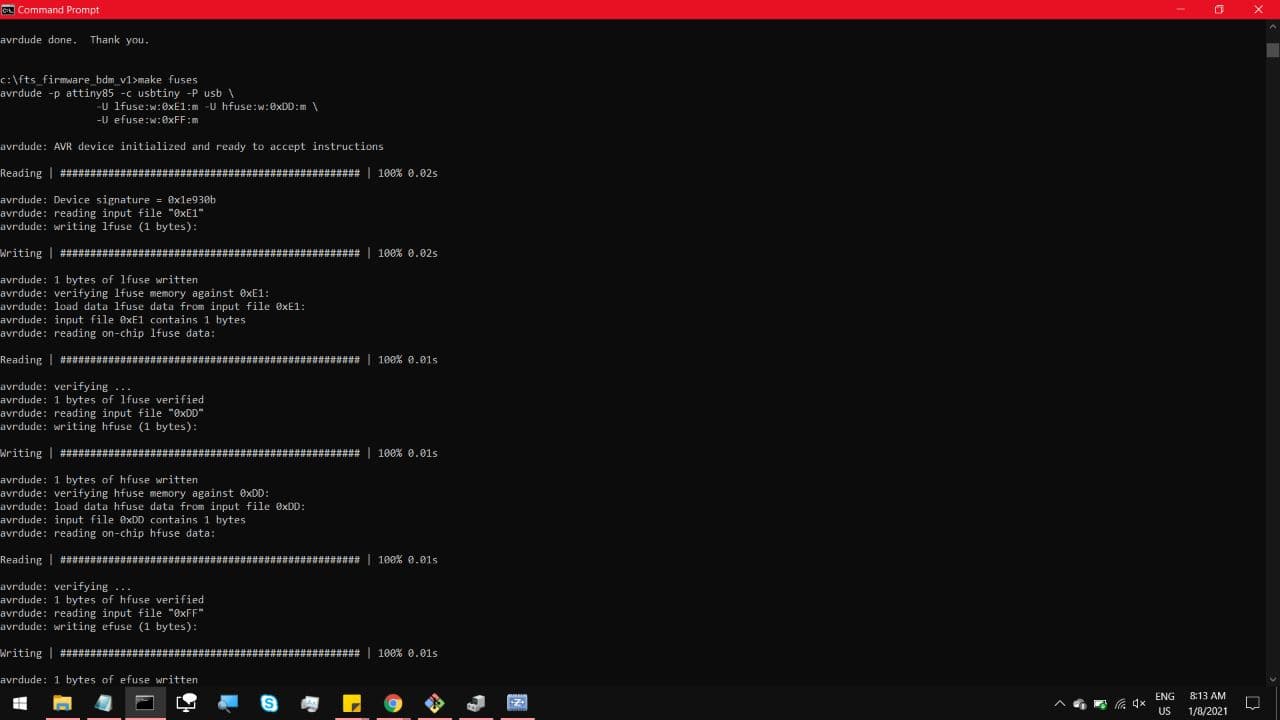
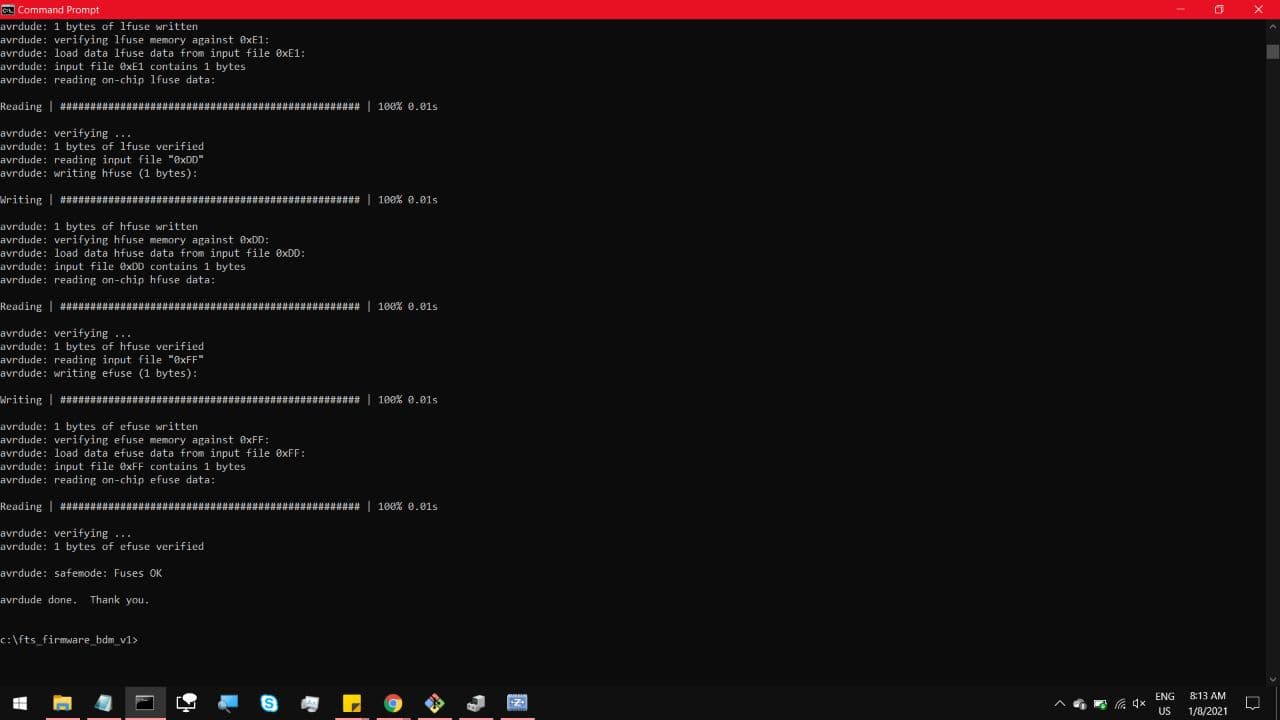
make fuses
this will program fuse bits onto the target chip, which will be blown out later
make rstdisbl
this will blow out the fuses on the target programmer, Locking it into its state as a programmer
which also means that you Only do this when you are sure everything went right.
And just for reference here is the full list of commands and responses on the terminal.
you now have a working usb programmer, so we can use it to program our custom boards.
The first thing is to install an Arduino IDE core, to allow Arduino IDE to recognise Attiny ICs, such as ours.
you can find it on this Github page.
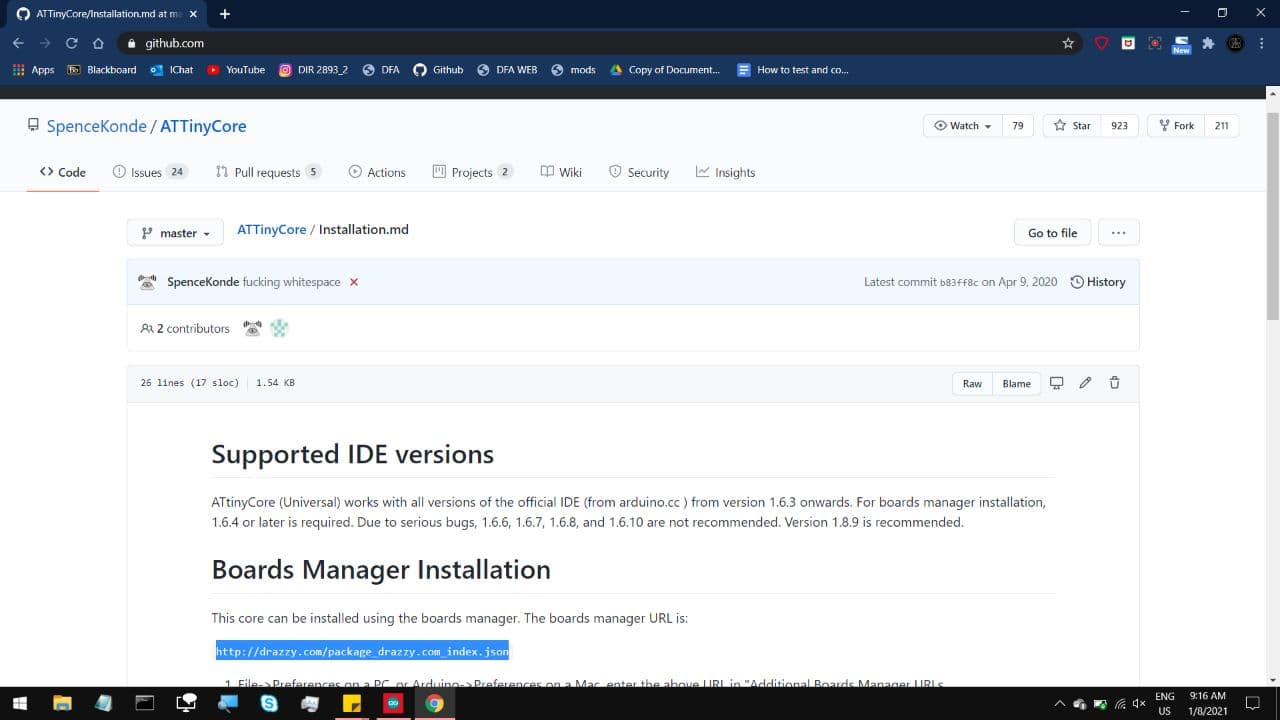
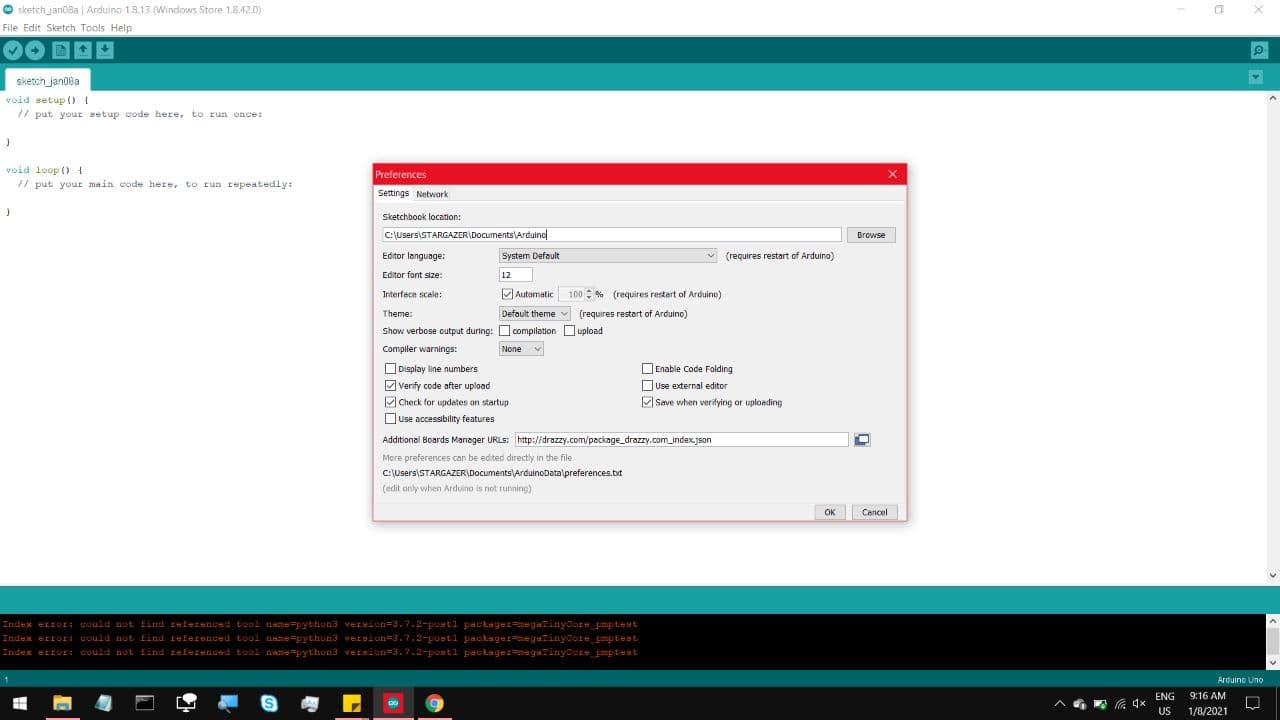
Or you can boot up Arduino IDE, go to preferences, and next to Additional Board Manager URLs,
type https://drazzy.com/package_drazzy.com_index.json
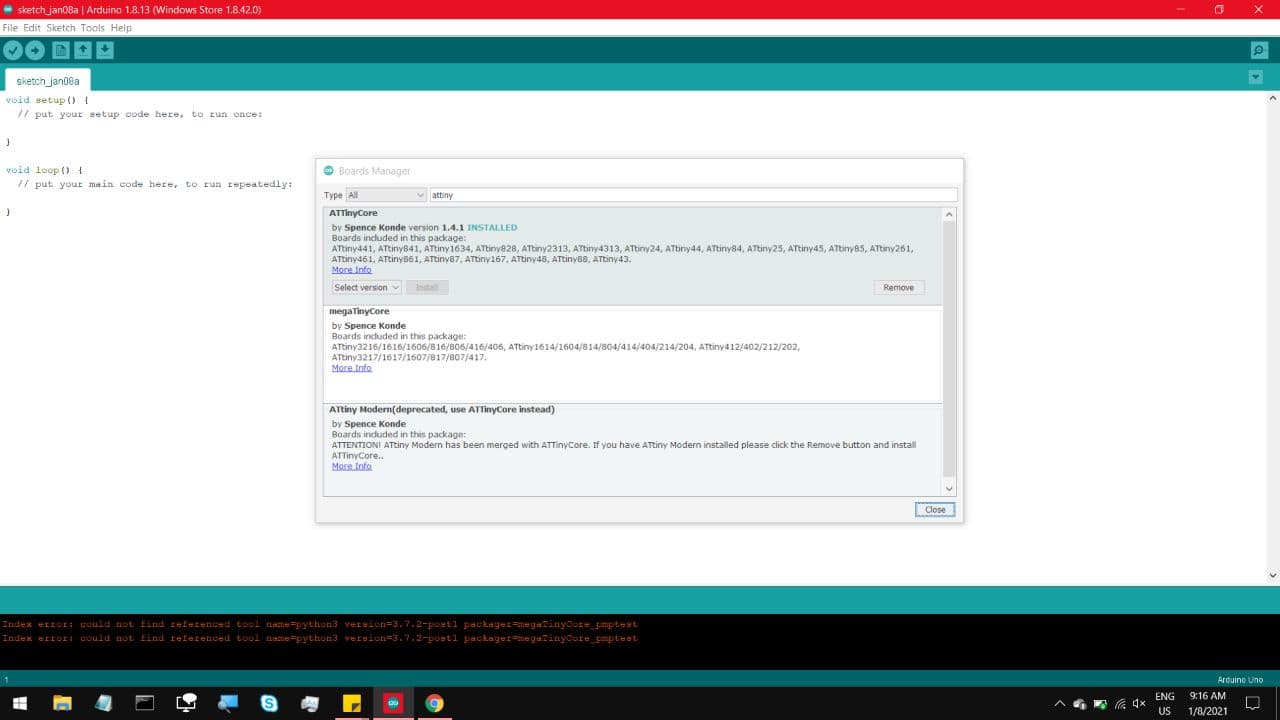
Now go under Boards Manager, and install the ATTinyCore pack, as seen here.
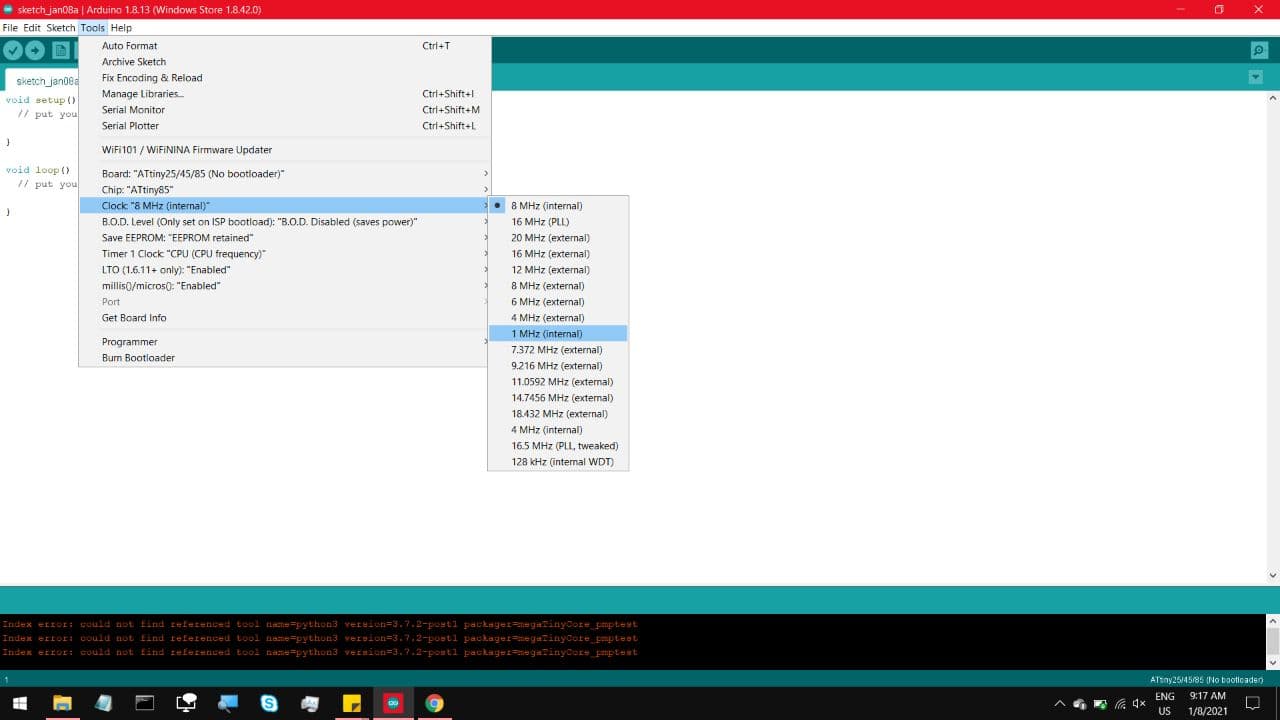
Now head over to Tools, for the Attiny85, you have to set the clock to 1MHz internal.
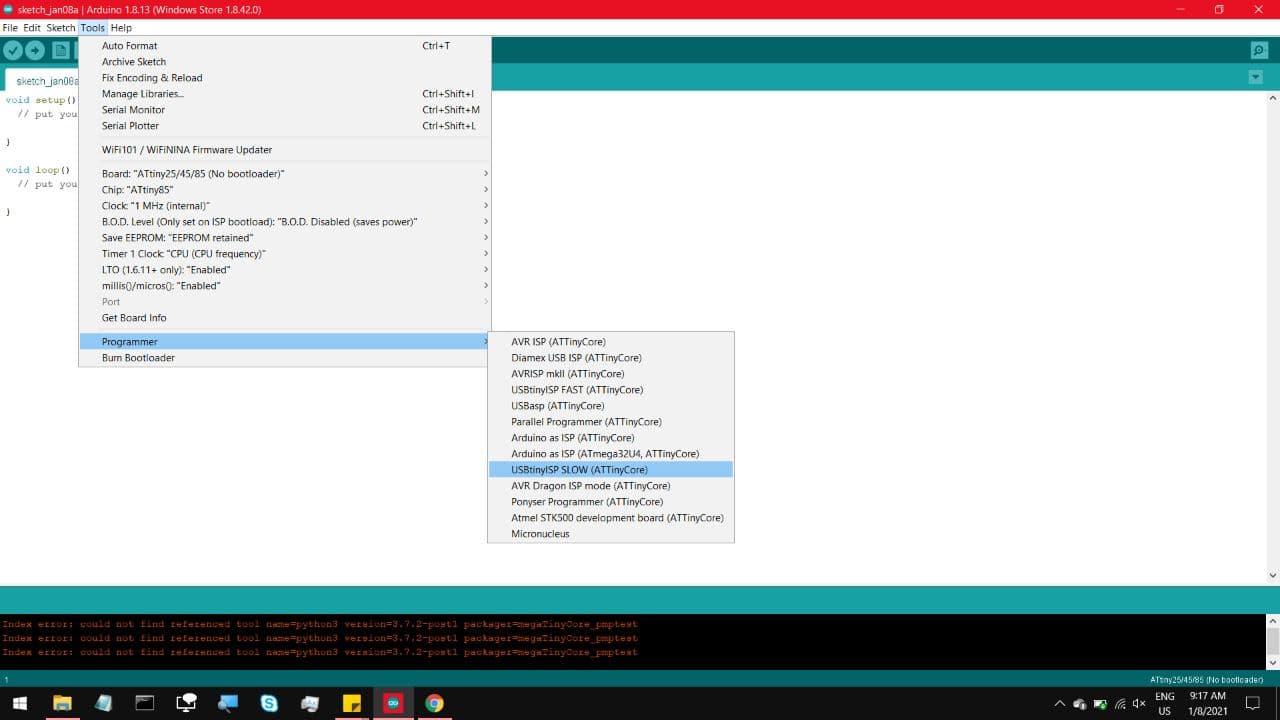
And on programmer, select the USBtiny SLOW (ATTinyCore)
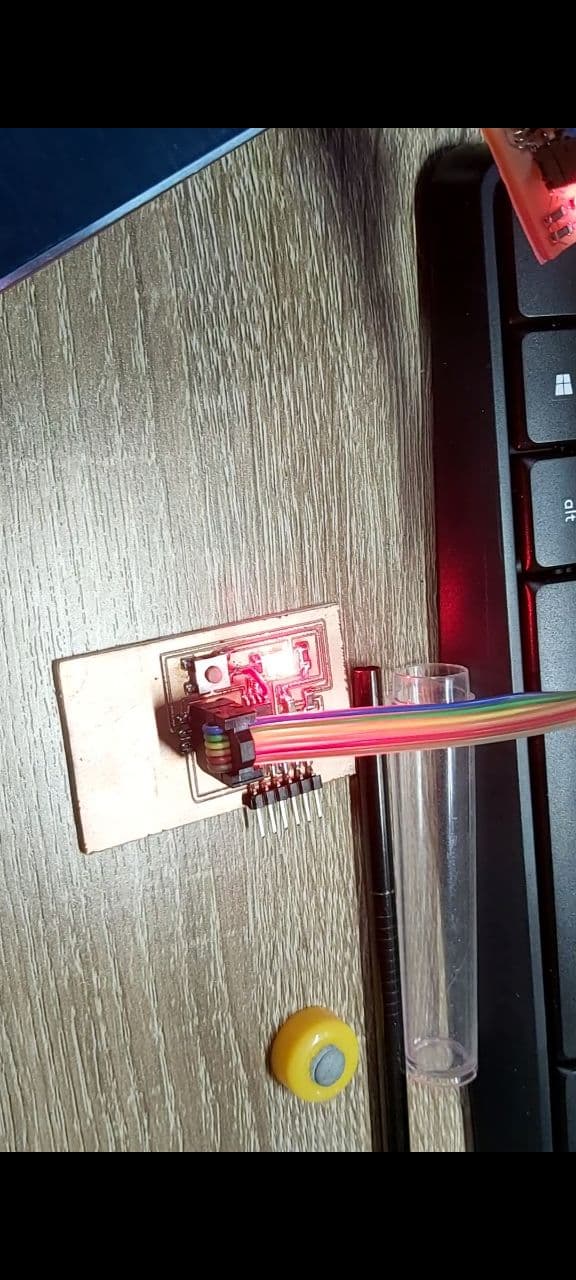
Now you are ready to plug in the Programmer, your board, and load up one of the preset blink programs.
The LED on this one is linked to Pin 4 of the IC, so be sure to change that. And after 2 months, it works.
Interfacing & Applications Programming