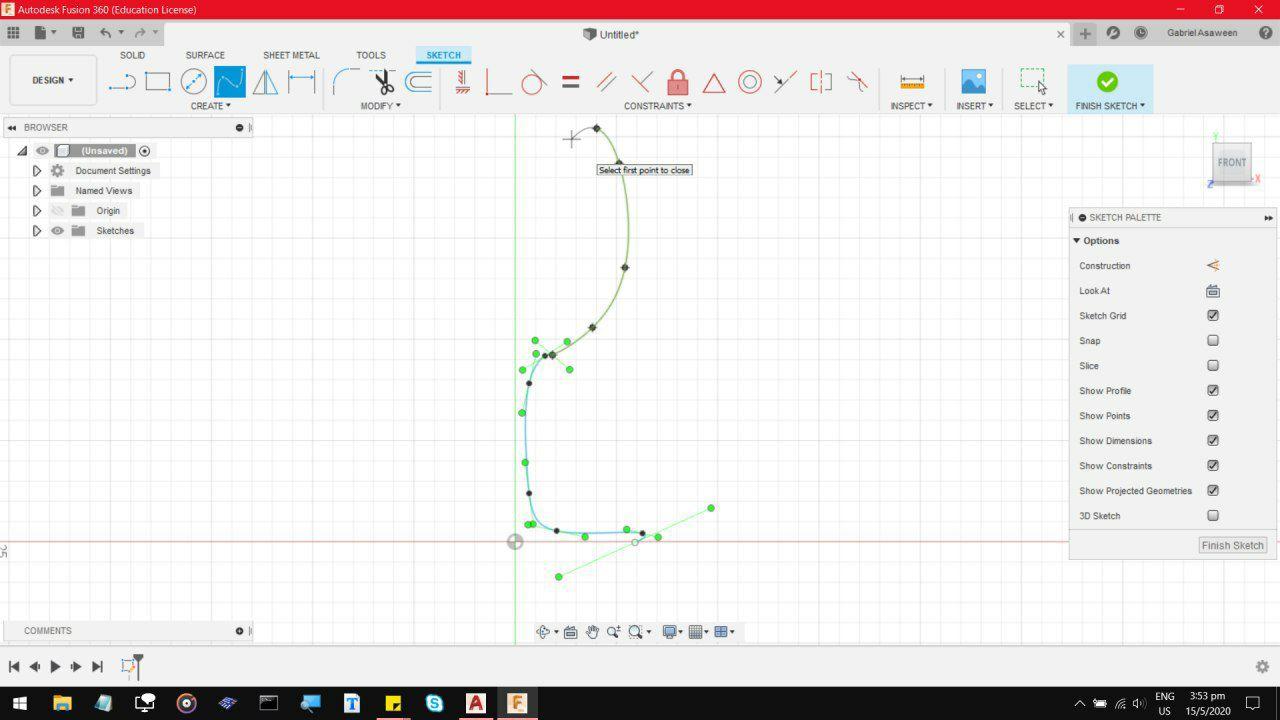
Today, we will be designing a little Wine glass in Fusion 360. This would be fairly short as
it is a fairly simple shape, and I drew it entirely by rough estimation, so none of this was
measured. First, get a decent reference image on google, and start a sketch on one of the
Vertical planes, which will make the next steps easier.
Next, start drawing the rough side outline/cross-section using the Polyline or the Spline
function. Its fine if it does not look good, you can edit that later on by dragging points.
Now you can drag the points to form a slightly more elegant shape.
Be sure to finish off the remaining outline with the Polyline tool,
which will help form decent straight lines, and give a nice blue highlight.
Next, use the Revolve tool under create, to sort of pull the sketch around
a central point. Do switch to the Homeview so you can tell if its gone wrong.
Finally, use the Shell tool to carve a hole into the top of it, set the thickness
down to about 2-3, which is fairly accurate to most wineglasses.
Overall, I would say this one went quite well. This tooke me about 20 minutes.
I would not trust this to be anything close to structurally sound, but I am sure
this can be printed. The printer might include scaffolding between the bulb and
around the base of the stem.
This next model is something that broke my ability to visualise 3D shapes. Turner's Cube is
typically a skill assessment project given to Machinists, as it poses an interesting design
problem that is not instantly obvious. I am now aware (after many attempts in fusion 360)
that you can produce this design with only a drill press or a lathe, given enough time and
precision. So after about 3 attempts in Fusion 360, I managed to design my own Turner's cube
with a slight modification at the end, to demonstrate the unique design capabilities of 3D printers.
First, build a simple cube, I designed this with a 70x70x70mm cube, because anything smaller
would be too fragile and anything larger would take Hours to print and quite alot of filament.
Next, sketch out a circle from the center of each cubeface, and extrude them down to produce these
circular recesses. it is important to be consistent with the dimensions, I tend to stick about 10mm
from the edge as it should give some level of structural stability when printing.
Now repeat on the other 3 sides to see the effect.
Now repeat the same process again on the smaller cube faces, as many times as you like,
or at least as many times as your structure size allows.
And again on the other 3 cube faces
For this next section, I have chosen to sketch and cut square holes instead of a circular
one. I have absolutely no idea how to produce this design with a drilling motion as you can
only do circular drill holes on something like a lathe or a drillpress.
After that, it was just a matter of selecting the various edges and giving them a small chamfer
of about 2 or 1.5mm, just to give it some more interesting surface designs.
I should mention, this is the third attempt at trying to build a Turner's Cube. My mistake
the first 2 attempts was that I kept extruding the initial circular cuts all the way through,
instead of leaving those step surfaces to make it look like this half-fractal shape.
But overall, I would say I am quite impressed with this one. It was a surprisngly simple solution
that took me quite a while to visualise. I can see why this would be quite challenging to reproduce
on an aluminium or wooden cube, you would have to get each cut exactly in the center, and at exactly
the right drill-depth, for all 6 cube faces, otherwise one of the corners would get cut clean through.
Other than being a neat little demonstrator, I make it a point to keep every
design I have,no matter how small or insignificant it may be at the time.
You never know when you might need to print a weird looking cube, and I am definitely printing this.
Today, we will be designing a small 3D model. This is a variation of the Turner's
cube, which fixes one of the main issues during printing which is straight Horizontal
lines, which a printer might not be able to do without extensive supports. This model
is designed to have as little straight unsupported horizontal lines as possible, while
still having an interesting shape. It also proved to be the limit of my laptop's processing
capabilities as just Loading the finished file is enough to set off warnings on my screen.
First, extrude a cube, and punch a hole through all of the six sides of the cube.
Rotate the cube by 45 degrees in 1 axis
Now, copy the cube, and tumble it in another axis by 90 degrees
Repeat again to achieve this Durian looking structure
Now, Combine every layer, just so the system stops lagging.
Now, hollow a Sphere from the inside of the cube, so that it makes the gaps more visible.
Feel free to start Improvising and merging, chamfering and extruding random pieces
Finally, merge every body down again so that the system lags less.
Overall, this model only requires supports along 4 surfaces.
From a test render, a 30x30x30mm cube would take 33 mins to print.