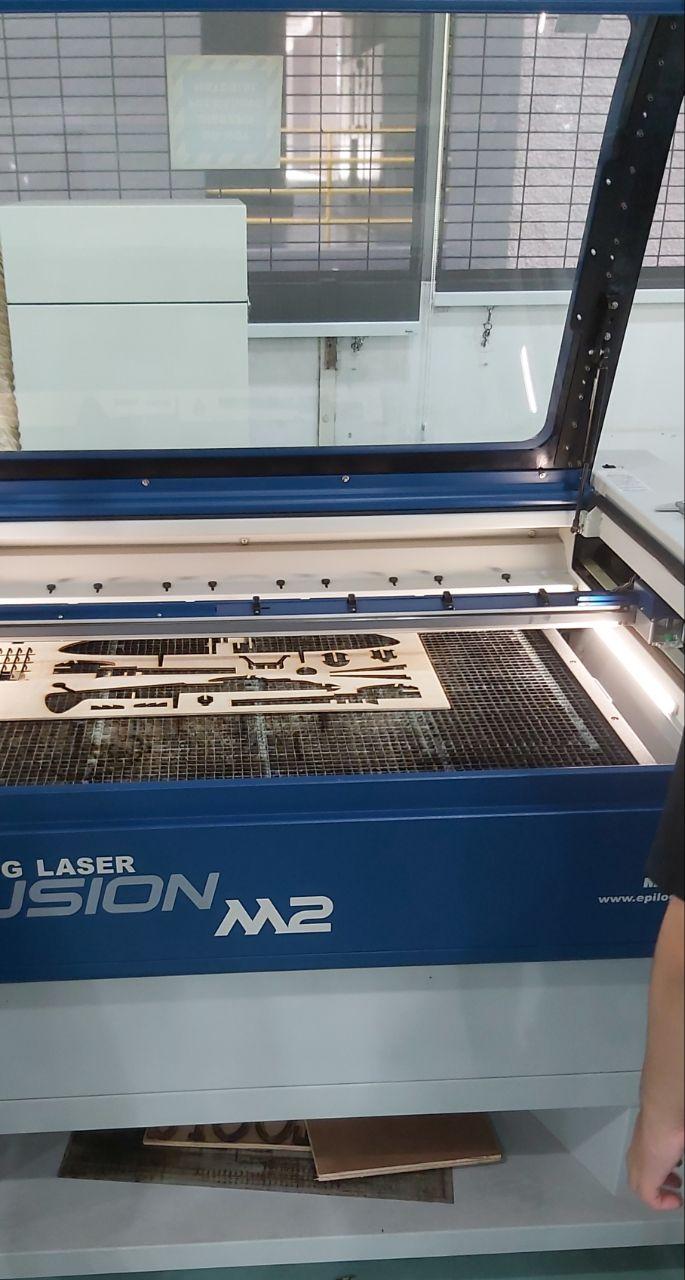
This section will cover everything needed to operate two machines, the laser cutter
(generally the same for most of them) and the 3D printer, specifically the Ultimaker 2+.
First, make sure you have your DXF loaded onto a thumbdrive, and ready to import onto the system
if it does not load after 2 tries, pull out your drive and let someone else use the machine.
Once it does load, align everything into the corner, with a margin of about 1-2mm from the edge,
If you are using the big one in that image, there is an analog stick on the right side you can
use to align the beam onto a specific portion of the workpiece. Remember to Zero and dry test.
If you are using Plywood, generally a good idea to do a small testcut somewhere nearby to check
for any impurities in the material. Once you get the beam strength and speed settings corrected
close the hood and print. Acryllic does not really have any major worries when it comes to impurities.
Once it is done, wait for about 30 seconds for the fumes to vent out the back. They're not concentrated
enough to be anywhere near harmful, but it still smells horrible. If you are engraving on wood, a good
trick is to paste masking tape over the engraving area. This would prevent any burns/discolouration on
the wood aroun the engraving, unless you prefer that sort of rugged industrial look to it.
We will start with this UI here, a slicer software named Cura, which is best used with a mouse
unless you have the finger dexterity of a surgeon with your trackpad.
Import your STL file from your computer, and have it Scaled, Positioned, and Rotated if necessary,
using the Panel on the left. Open up the Custom settings on the left for better control over the unit.
Once you hit slice, the estimated print time will be shown, and if you preview it, you can inspect
each individual layer. If the estimated print time exceeds the time it takes to become bored, you
can assume a trial and error strategy and mess around with the various settings to shorten the time.
Rafting, is it necessary?
Yes, even a small item will jerk around and mess up the print.
Supports, are they necessary everywhere?
Depends on the structure, I tend to leave it on anything overhanging more than 50-60 degrees.
Infill, does it need to be as dense as a brick?
Depends on the purpose, if it needs to be a functioning support piece, best to keep infill at 70-90.
If not, you can drop the infil down to about 20-30 if its something decorative like that Lotus.
Scale, does a model of the Starship need to be a 1.1 scale model?
Entirely based on personal preference. Do remember that the smaller you print, the less details there
will be on the actual model. If your printing something like an Apollo Lander, the smaller scale means
the antennas and stuff might just become a little blob.
Now, load the final project file into the dedicated SD cards, select your printjob, click print, and
sit back for about 3 hours.
There are a few ways to test a 3D printer's capabilities. One way involves an Overhang test to determine
just how sharp an angle can you print without the need for supports. Typically most PLA printers can do
a 50 degree or less incline, with no issues. Some of my other classmates will be doing other testmodels.
This here is my model, a series of thin rectangles spanning from a straight vertical, gradually stepping
down by 10 degrees, from 0 to 90 degrees as indicated by the numbers. I am fairly certain that the 80 and
90 degree angles will not survive the print, but theres only one way to find out, time to slice and print.
Its taken only about 2 hours to print, ive set it down to a slightly slower speed just to give it the best
chances of layering properly. But I am genuinely impressed, the Ultimaker could handle far more than expected.
From the side, it appears to only have issues beyond 80 degrees, which was expected.
I applied some black accenting fluid to give some contrast in this photo,
its barely struggling on the 60 and 70 slopes, only having some big blobs
on the 80 slope, the 90 slope is just a spaghettified mess, but from 0 to
50 its flawless, which makes me question how much time I wasted printing
supports that were unnecessary.
what really surprised me, was that it appears completely fine from the back. The 90 slope
is slightly warped upwards, but even the 80 degree plate looks completely fine. This might
be because the slopes are about 2mm thick, which gives enough plastic underneath to support
a smooth layer.